Gene Set Basket
The Gene Set Basket is where you find your previously saved gene sets and all the other gene sets that you have permission to access.
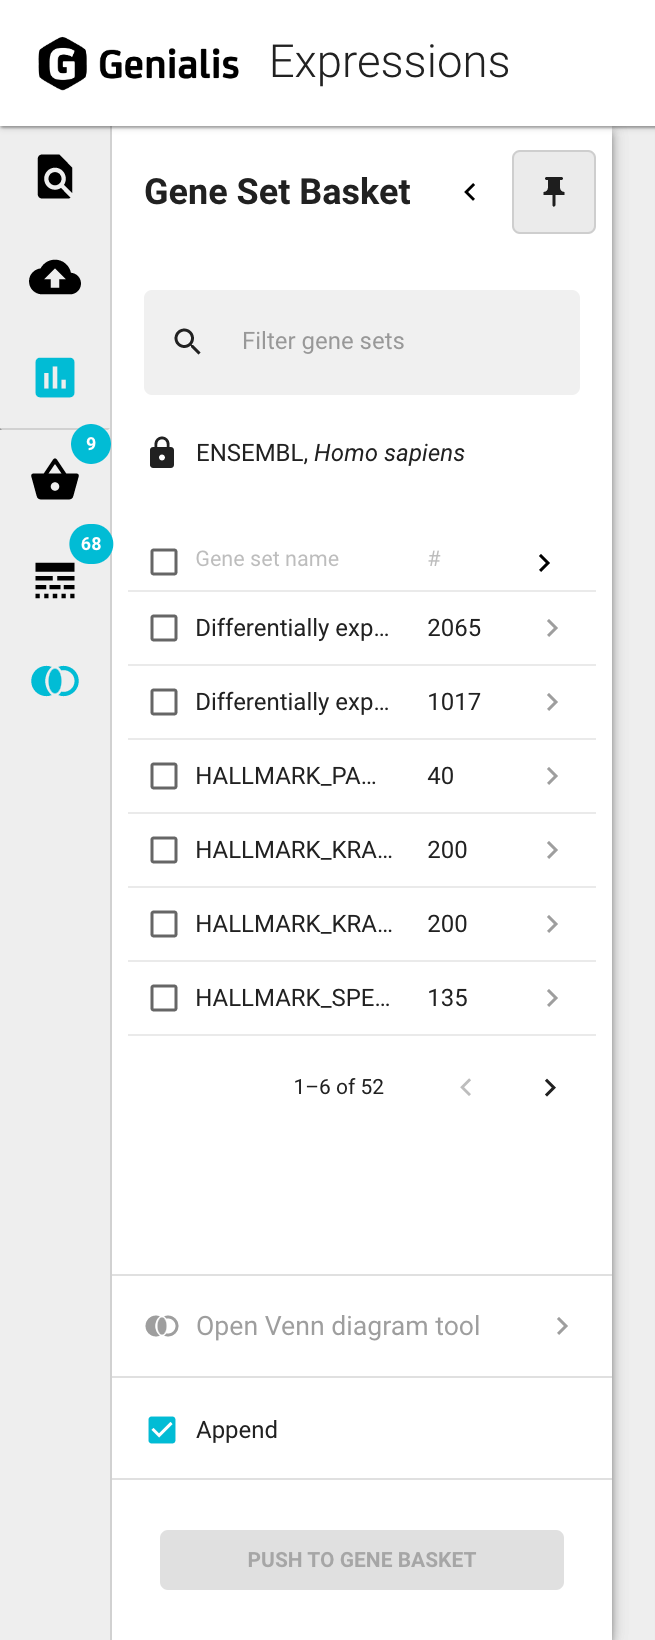
The Gene Set Basket panel is a multi-layered drawer that will open by clicking on the Gene Set Basket Basket icon in the main navigation bar. By default the main panel overlaps the existing screen content. It can be collapsed back in order to maximize your screen space by clicking on the ‘Collapse’ icon button in the top right corner of the panel OR pinned by clicking on the ‘Pin’ icon button so that the main panel is integrated next to the existing content on your screen rather than overlapping it. All further panels will always open and close intuitively as you click through specific features.
Manage gene sets
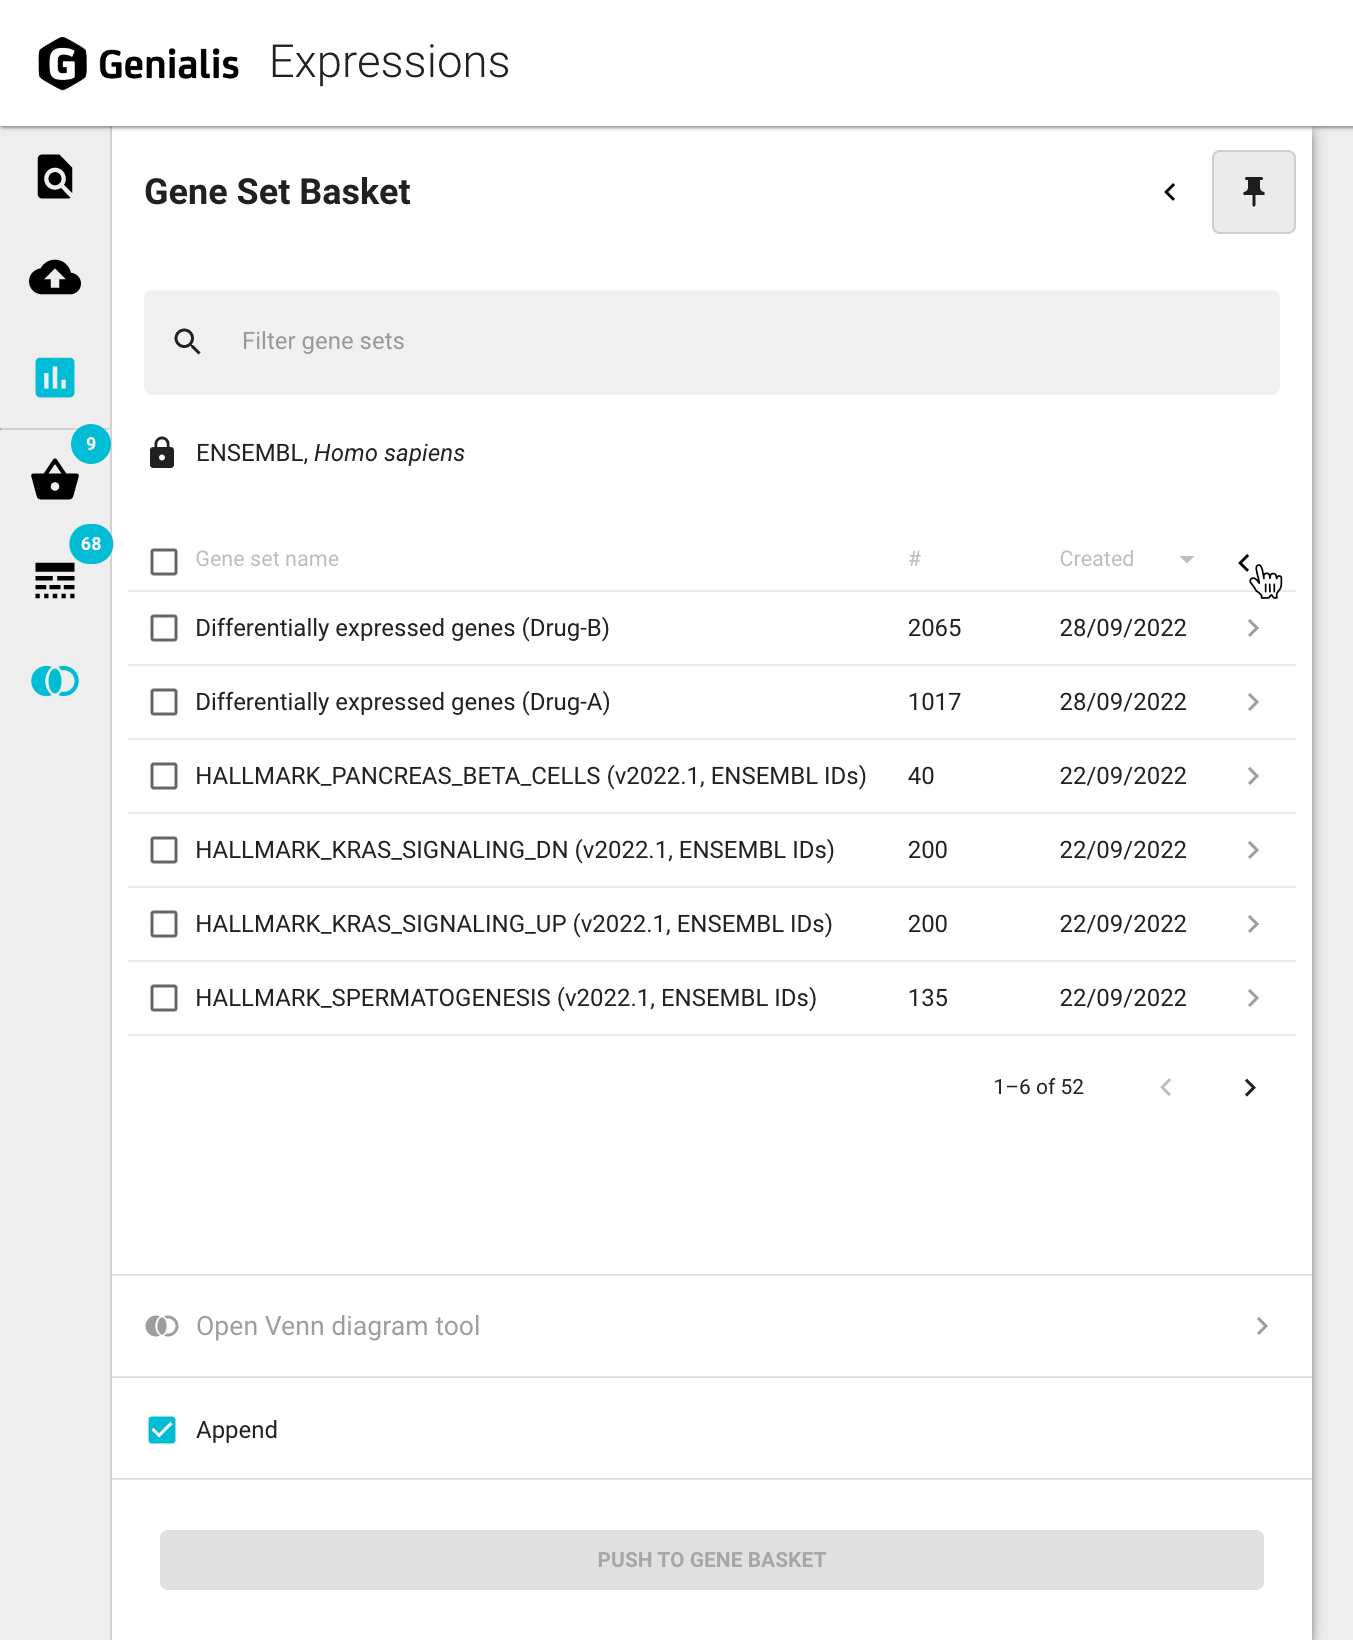
The main panel of the Gene Set Basket displays a list of gene sets in a table. This table will give you basic information about each of your gene sets: gene set name, the number of genes in that gene set and when it was created. The date of creation can be revealed by clicking on the ‘Show details’ icon button which will expand the main panel. You can collapse the panel back again by similarly clicking on the ‘Hide details’ icon button.
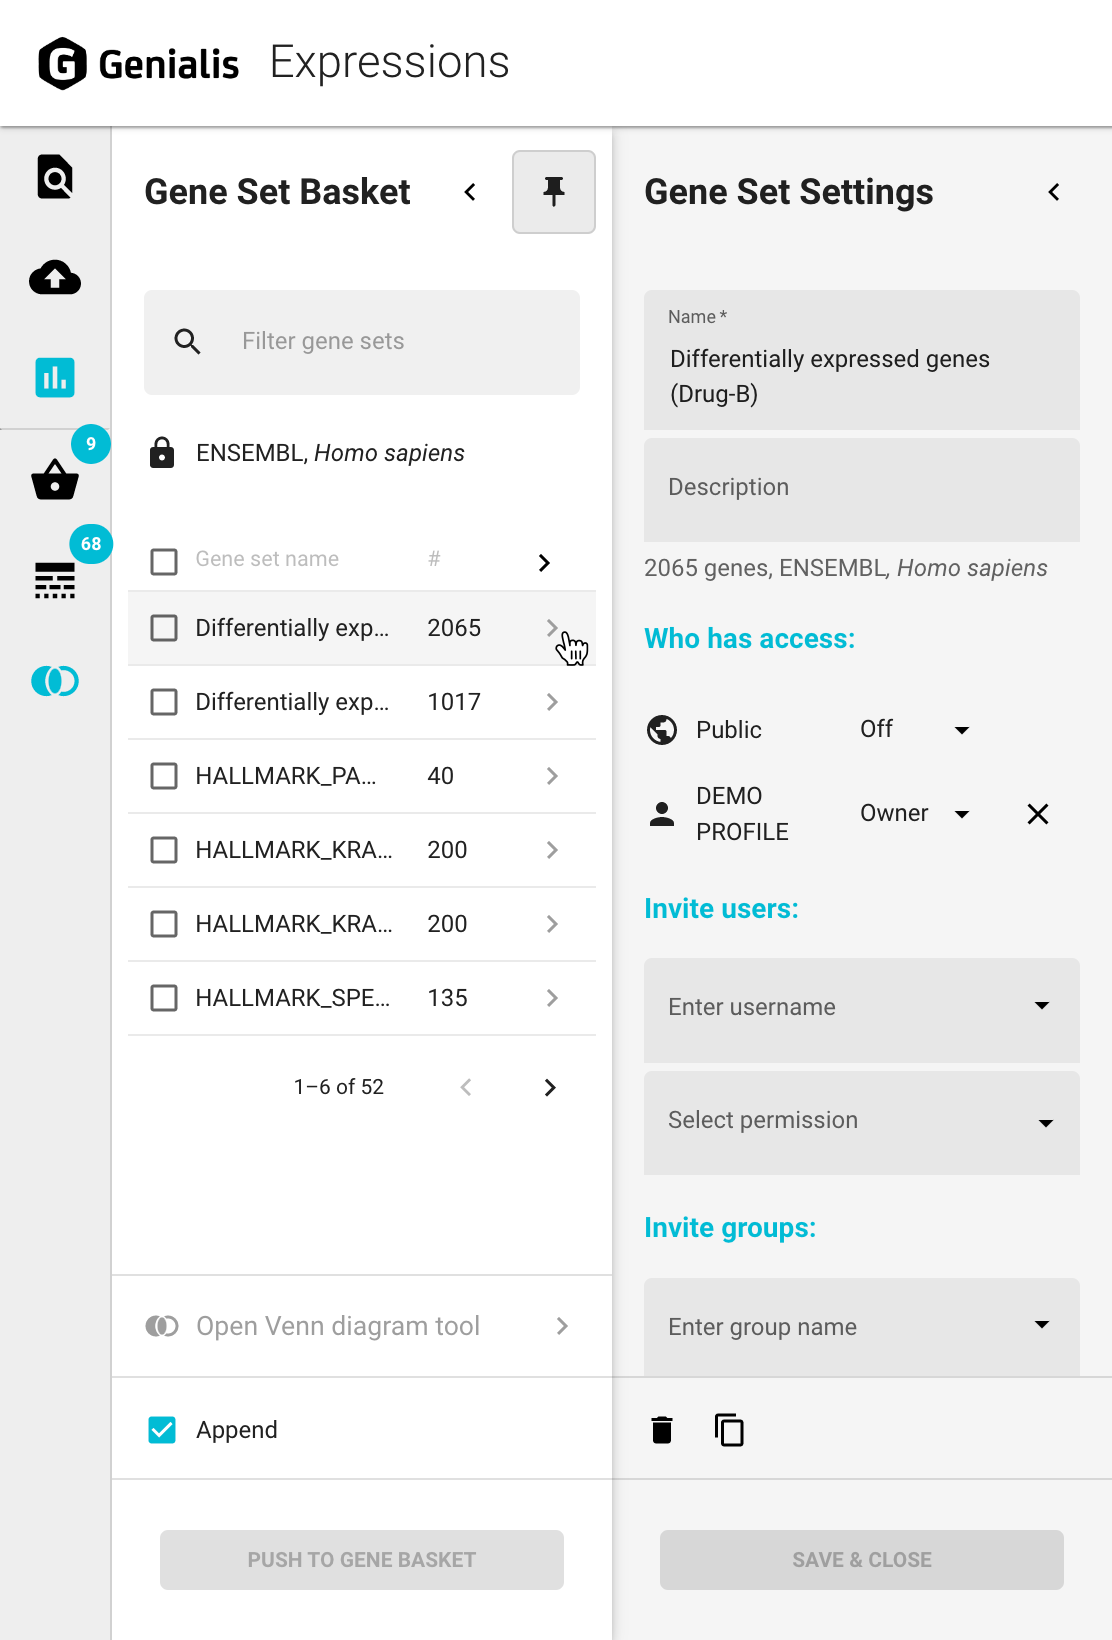
For further gene set management open the Gene Set Basket and click on the ‘Show gene set settings’ icon button next to the gene set name. This will open the Gene Set Settings panel where you will be able to manage the following:
Edit
Update the gene set name and description in the appropriate input fields
Share
The current permissions levels for all the invited Users and Groups are listed under the ‘Who has access’ section, ranging from ‘Owner’ with full access and moving down through ‘Share’, ‘Edit’, and ‘View’ which is the lowest level of access. There is also an option to set the Public access which only has two permission levels: ‘View’ and ‘Off’.
New users/groups can be invited by using the invite forms and clicking the ‘INVITE’ button. You’ll need to know the exact name of the user or group to share data. If you are not sure, please contact support@genialis.com for assistance.
Permission levels for existing users/groups can be changed by selecting a different level from the dropdown
You can completely revoke permissions for existing users and groups by removing them from the list by clicking on the ‘X’ icon button next to the user/group name. Public access entry can’t be removed - you can simply select ‘Off’ from the dropdown menu next to it if you don’t wish for your data to be publicly available for all Expressions users. ‘Off’ is also the default Public permission level for all new data.
Duplicate
Duplicate a gene set by clicking on the ‘Duplicate gene set’ icon button. A copy will appear in the Gene Set Basket list.
Delete
Delete a gene by clicking on the ‘Delete gene set’ icon button. Be sure to use this option with caution, as there is no coming back once you delete something. Note that all changes must be confirmed by clicking the ‘SAVE & CLOSE’ button at the bottom of the panel.
Push gene sets to Gene Basket
Managing genes in the Gene Set Basket will not influence the visualizations until you push the chosen gene sets to the Gene Basket. You can do this by selecting the desired gene sets (1 or more) and clicking on the ‘PUSH TO GENE BASKET’ button.
By checking the ‘Append’ option you can decide whether or not to append this selection to the existing Gene Basket content.
Venn diagram tool
Venn diagrams are handy to see the overlap between your gene sets or to compare your saved gene sets to publicly available sets.
Create a new Venn diagram
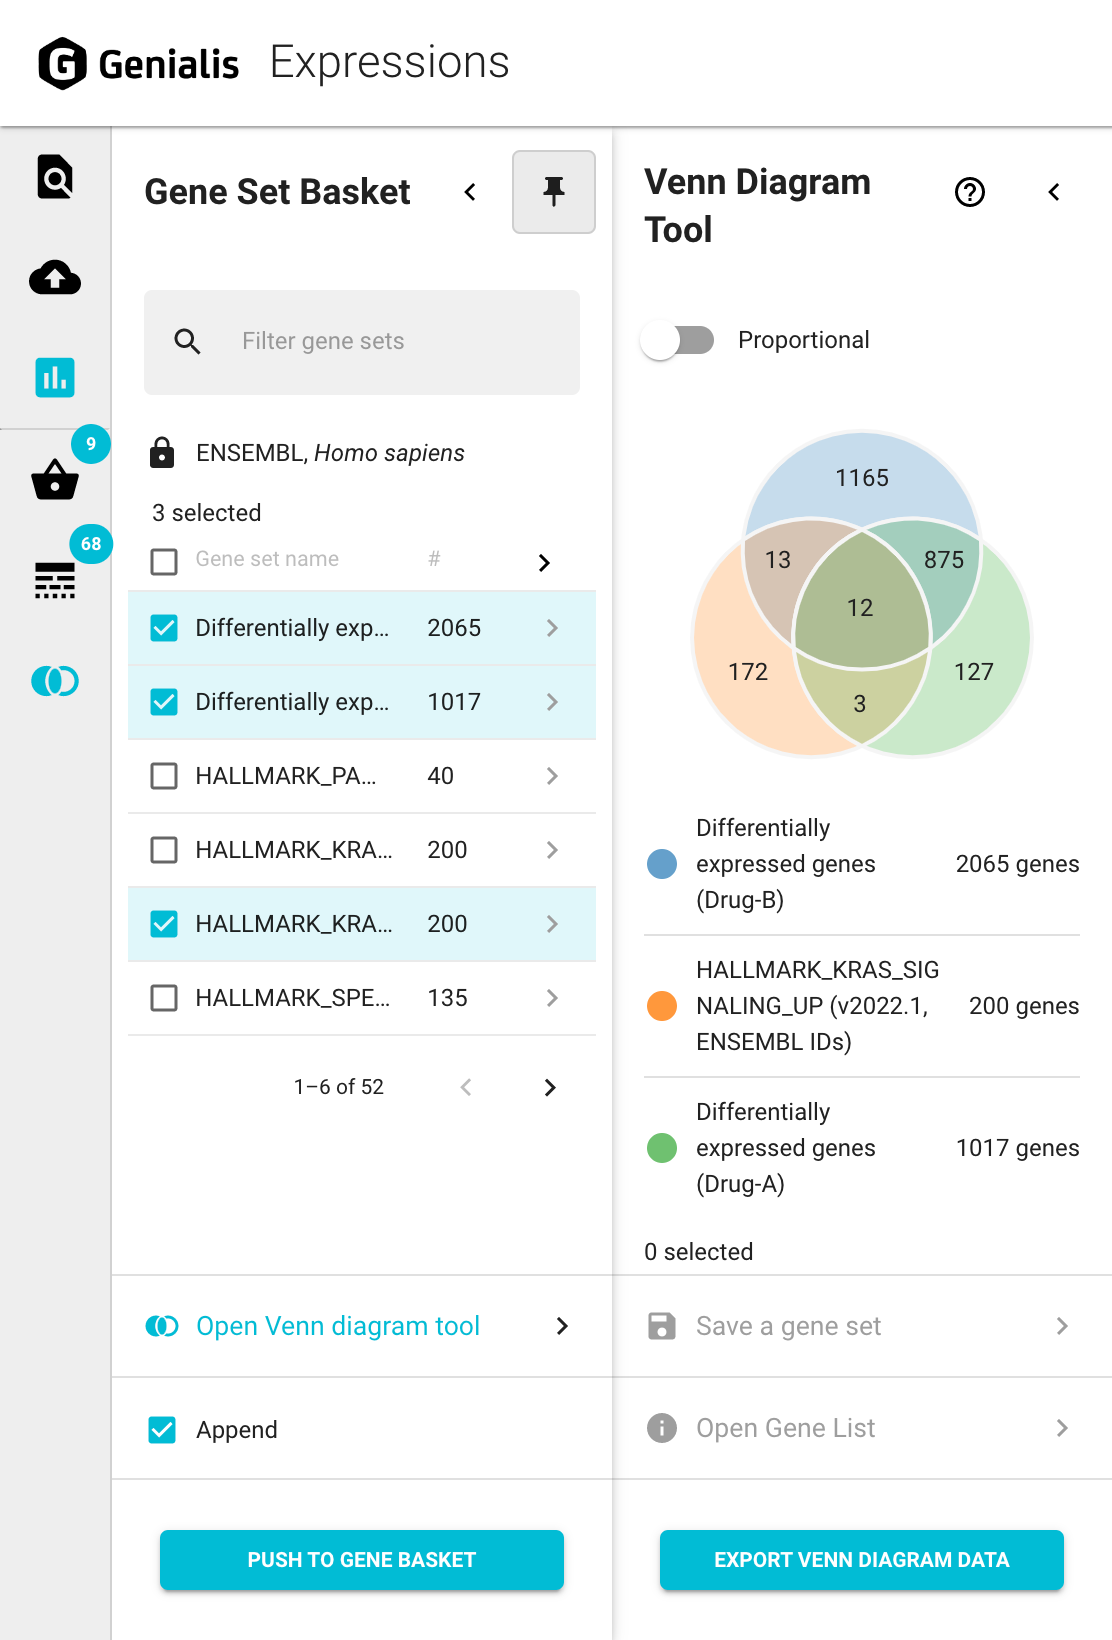
Selecting two, three or four gene sets will allow you to generate a Venn diagram by clicking the “Open Venn diagram tool” link in the bottom of the Gene Set Basket. This will open a new panel (called Venn Diagram Tool) with a newly created Venn diagram of your selected gene sets.
Note that only genes from the same gene ID sources (UCSC, ENSEMBL) and species can be compared.
Explore Venn diagrams
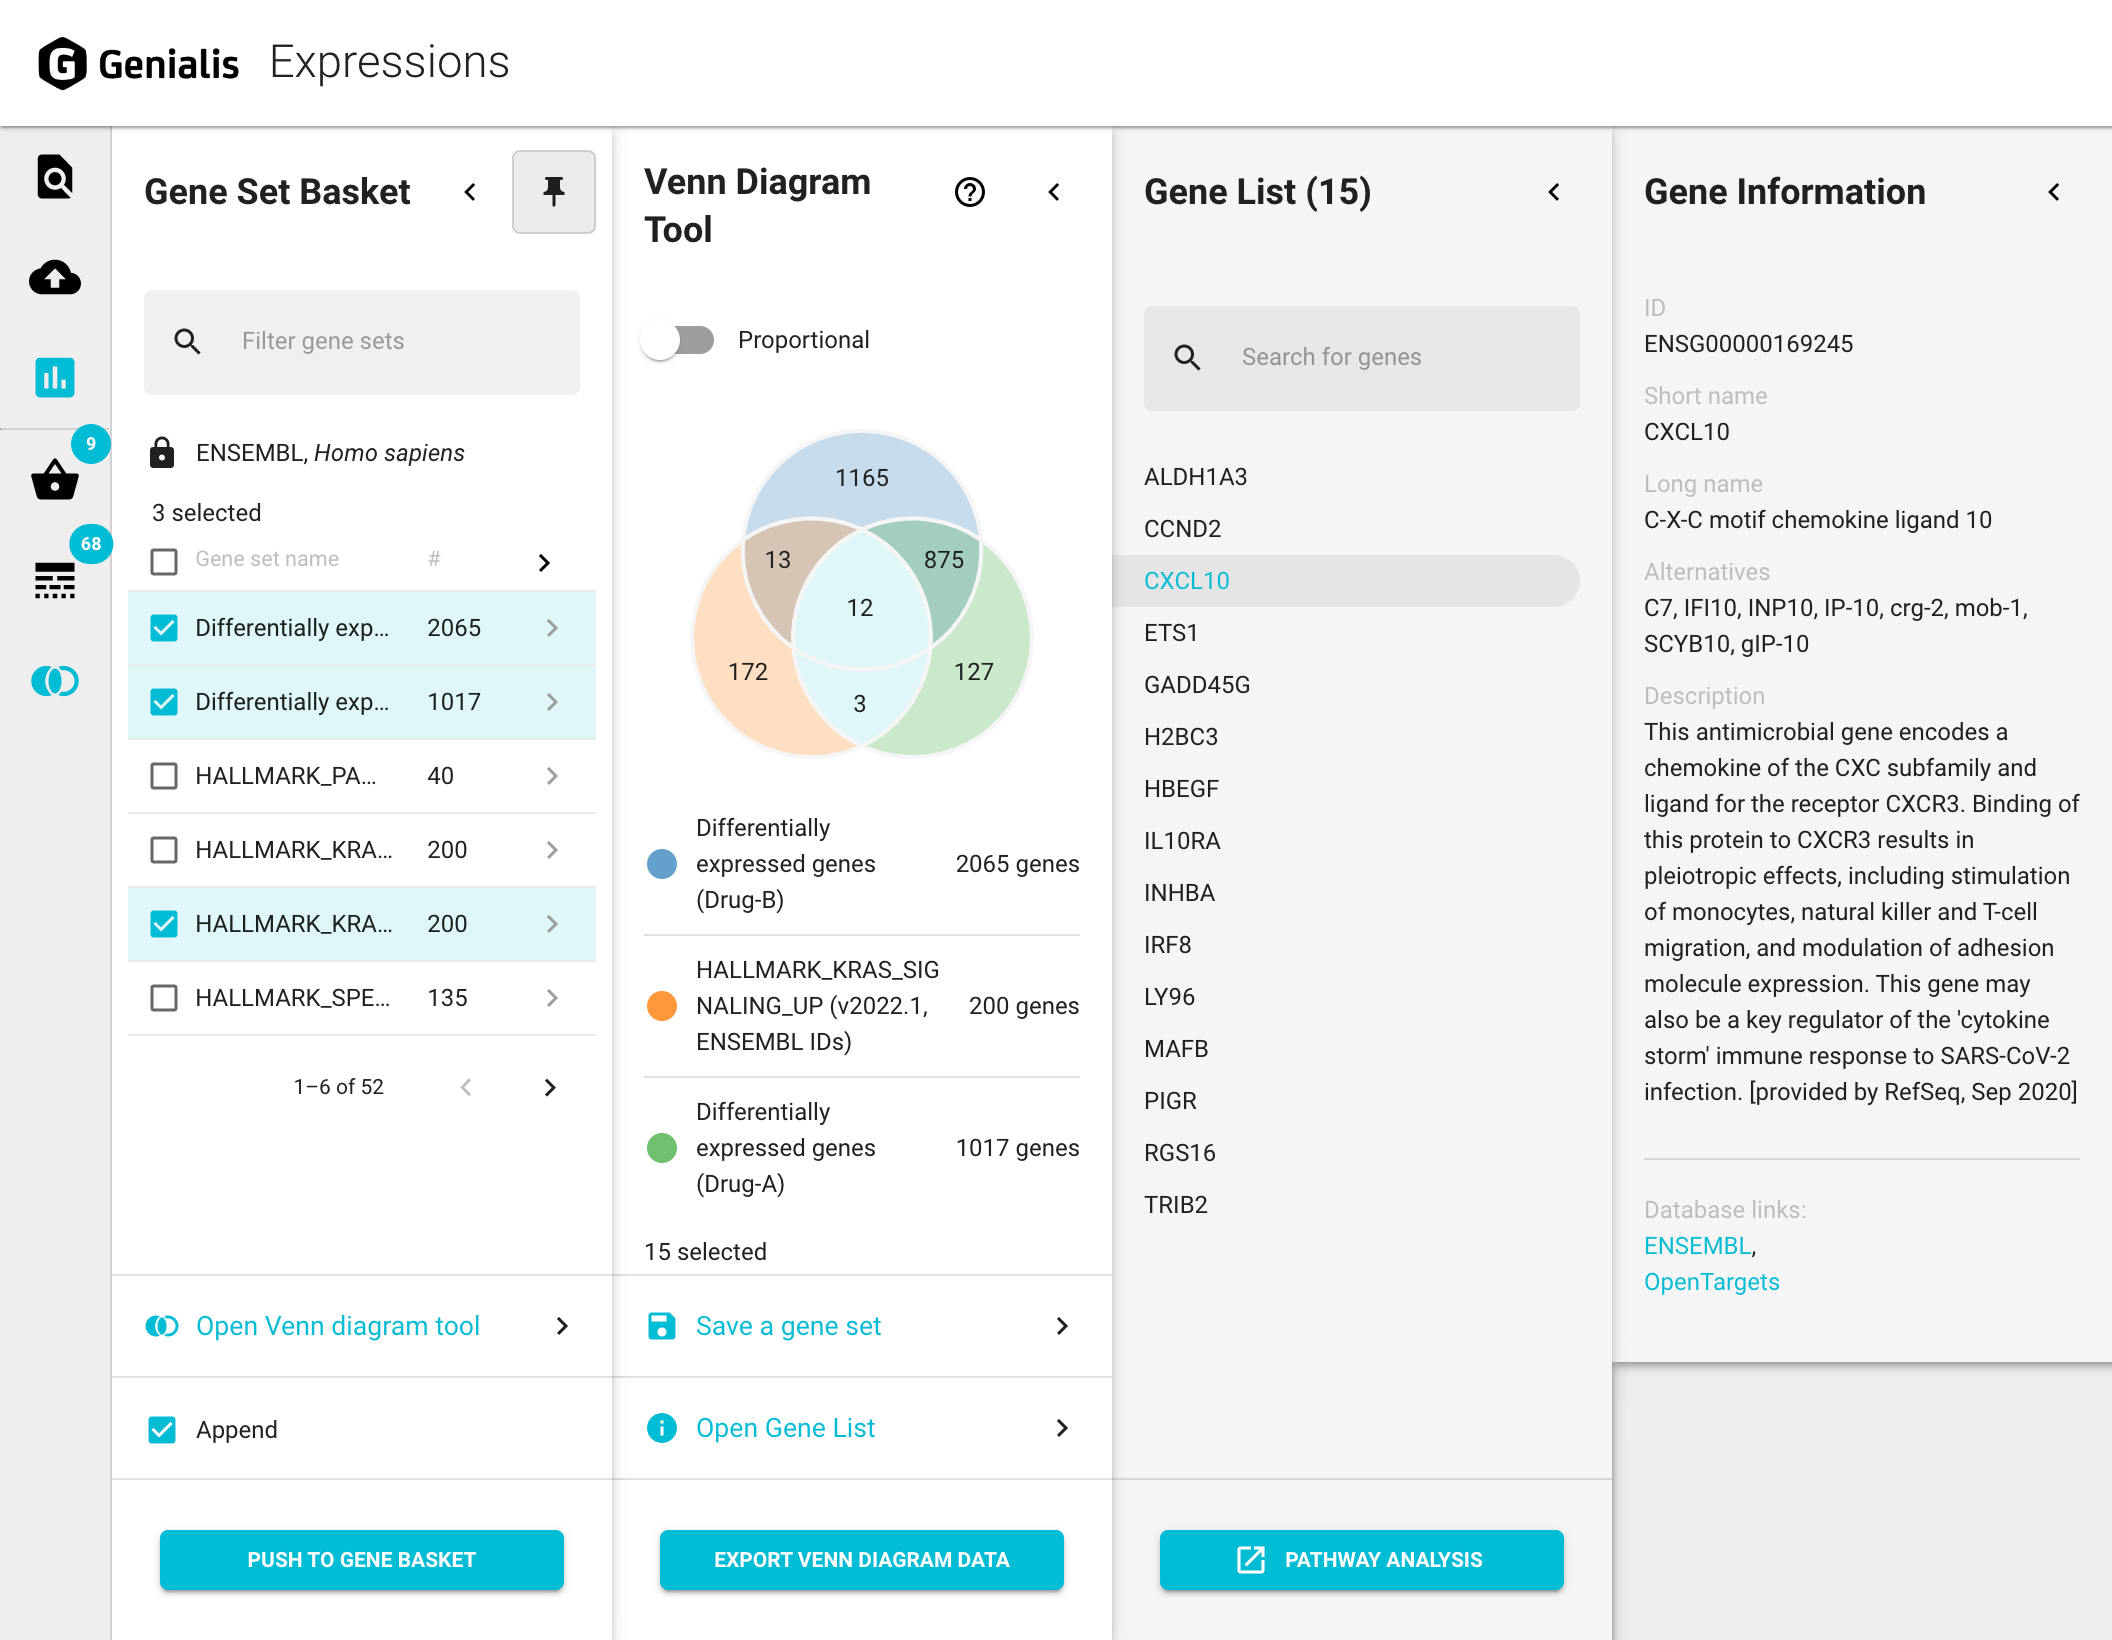
By default each Venn diagram is displayed schematically with all the areas of equal size. However you can toggle the ‘Proportional’ switch to make the circles log-proportional to the number of genes.
The whole Venn diagram is clickable: by clicking on specific areas one by one, genes of that area are selected. The selected areas are highlighted in light blue. To deselect an area, click on it again.
Once you have selected the desired areas from the Venn diagram you can inspect genes in those areas further by clicking on the ‘Open Gene List’ link at the bottom. A third panel called Gene List will appear where you can click on specific genes to learn more about them in the Gene Information panel or click on the ‘PATHWAY ANALYSIS’ button to open Enrichr results in a new browser tab.
Save a new gene set from selected Venn diagram areas
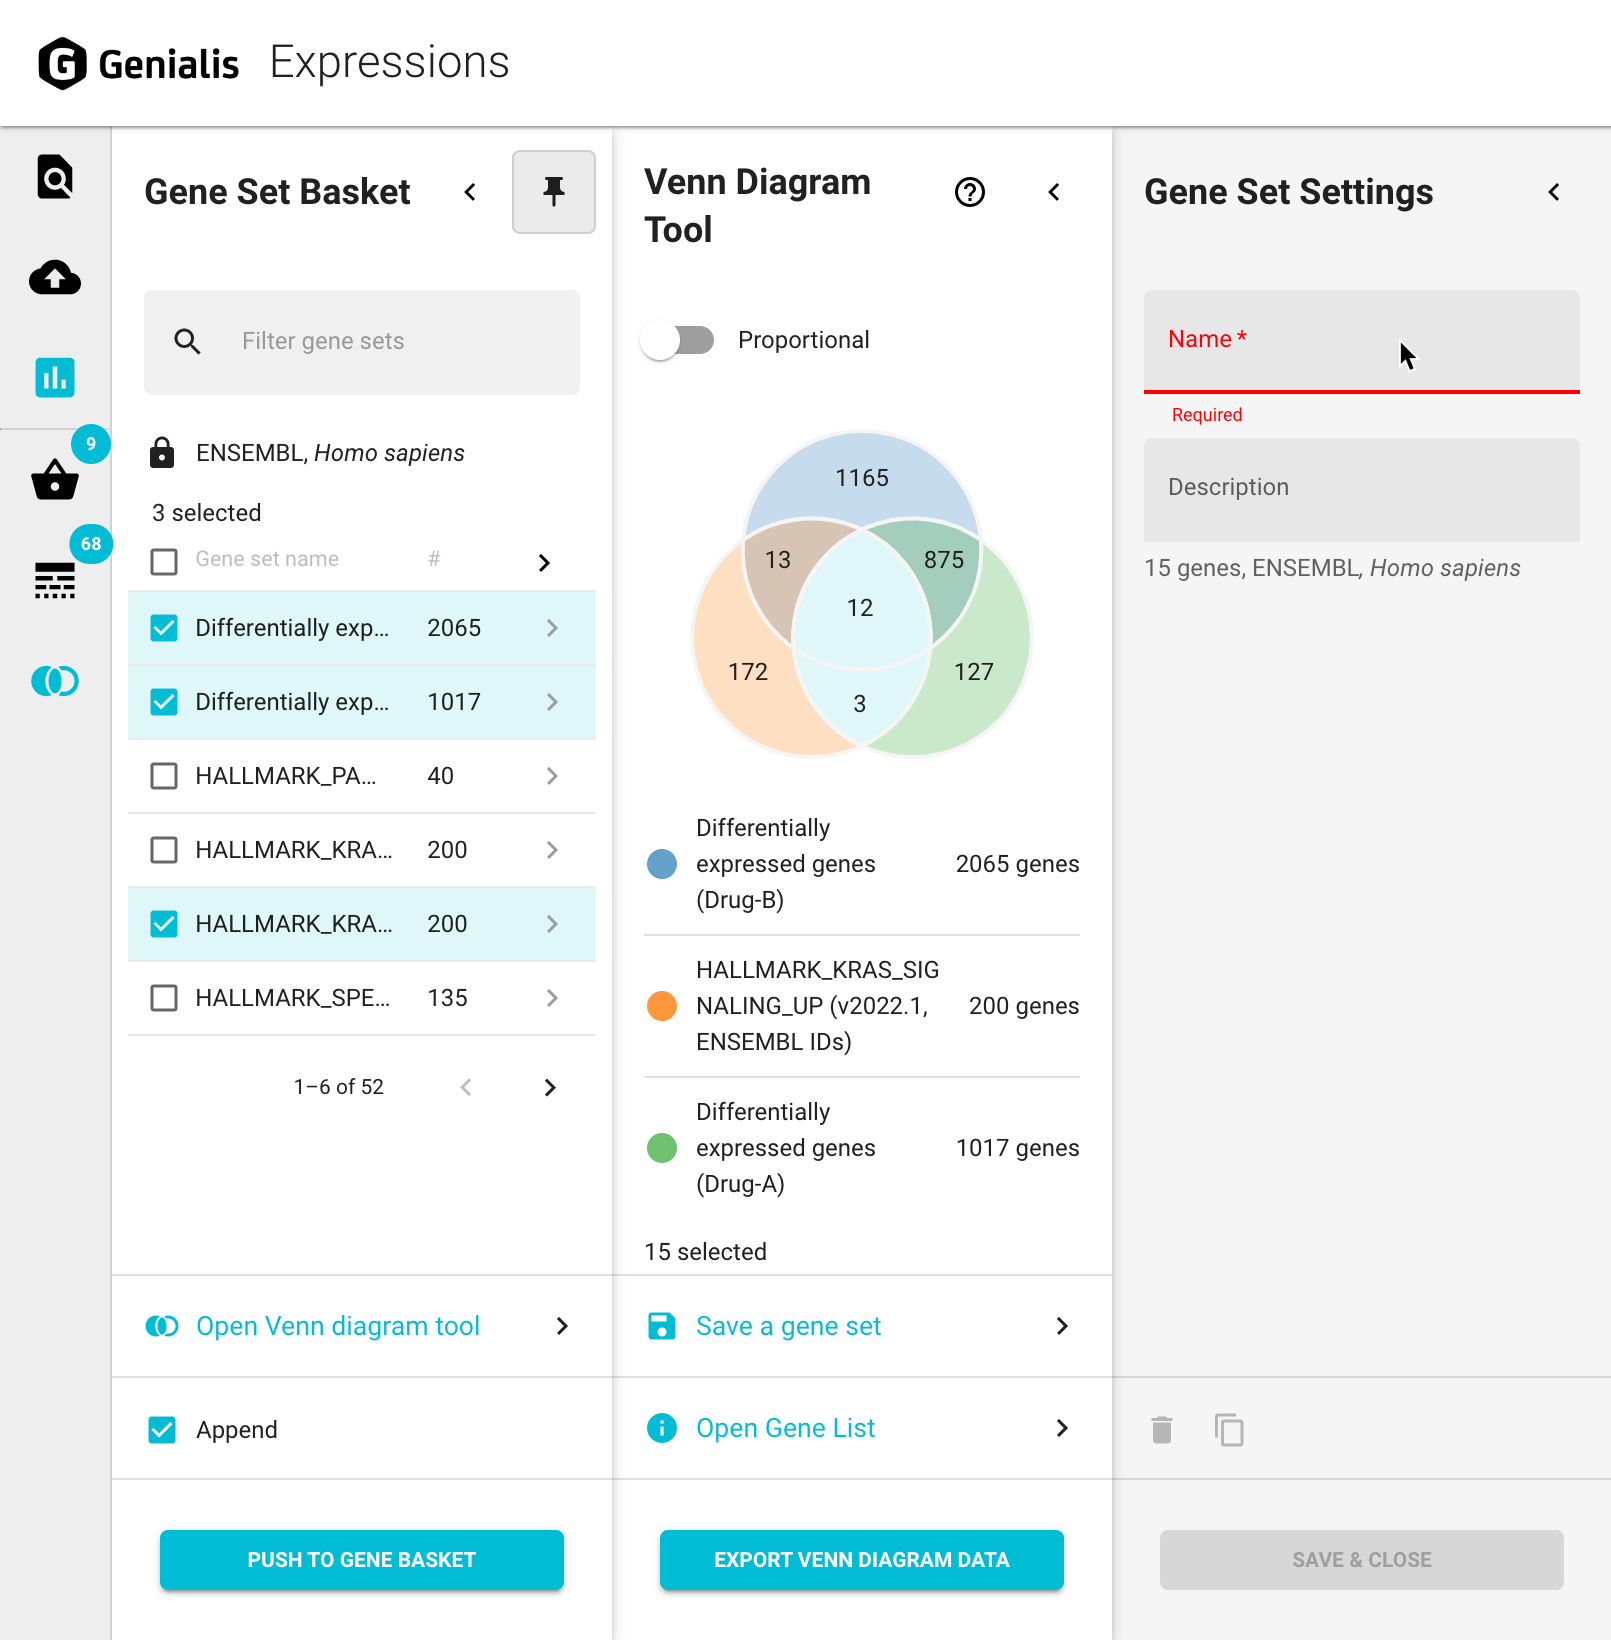
You can save the genes from desired areas in a Venn diagram as a new gene set by selecting them and then clicking on the ‘SAVE A GENE SET’ button at the bottom of the panel. This will open a new Gene Set Settings panel. Here you can give your gene set a name and a description. Once saved (by clicking the ‘SAVE & CLOSE’ button), this gene set can be loaded for use again in the future.
Download Venn diagram results
If you are interested in downloading your Venn diagram results, click on the ‘EXPORT VENN DIAGRAM DATA’ button. This will download a zipped report file that contains:
Raster and vector plot image (.png and .svg)
A suggested caption text (.txt)
A table with information about the genes in the Venn diagram (.tsv*)
*TSV (tab-separated-value) format files are plain-text tabular files that can be imported into any spreadsheet program.