In Detail: CUT & RUN
Description
Genialis Expressions offers support for CUT & RUN (Cleavage Under Target and Release Using Nuclease) workflow. The concept of this Cut & Run Workflow is based upon that described by Zhu et. al. and Skene & Heinkoff, and includes steps of trimming the reads with Trim Galore, aligning them using Bowtie2 to both target species genome and a spike-in genome and ability to mask using promoter regions. Aligned reads are processed to produce bigwig files, which can be viewed in a genome browser. Peaks are called using MACS2. Size selection of fragments is done during the alignment step.
NOTE: The Motif sites (BED file) and Cut Matrix steps are not part of Genialis CUT & RUN workflow, as described in aforementioned references.
Pipeline details - tools and parameters
The CUT & RUN workflow consists of two parts. The first part is preprocessing of the input data, while the second part is the actual peak calling. See process parameters to see default settings and adjust them depending on your needs.
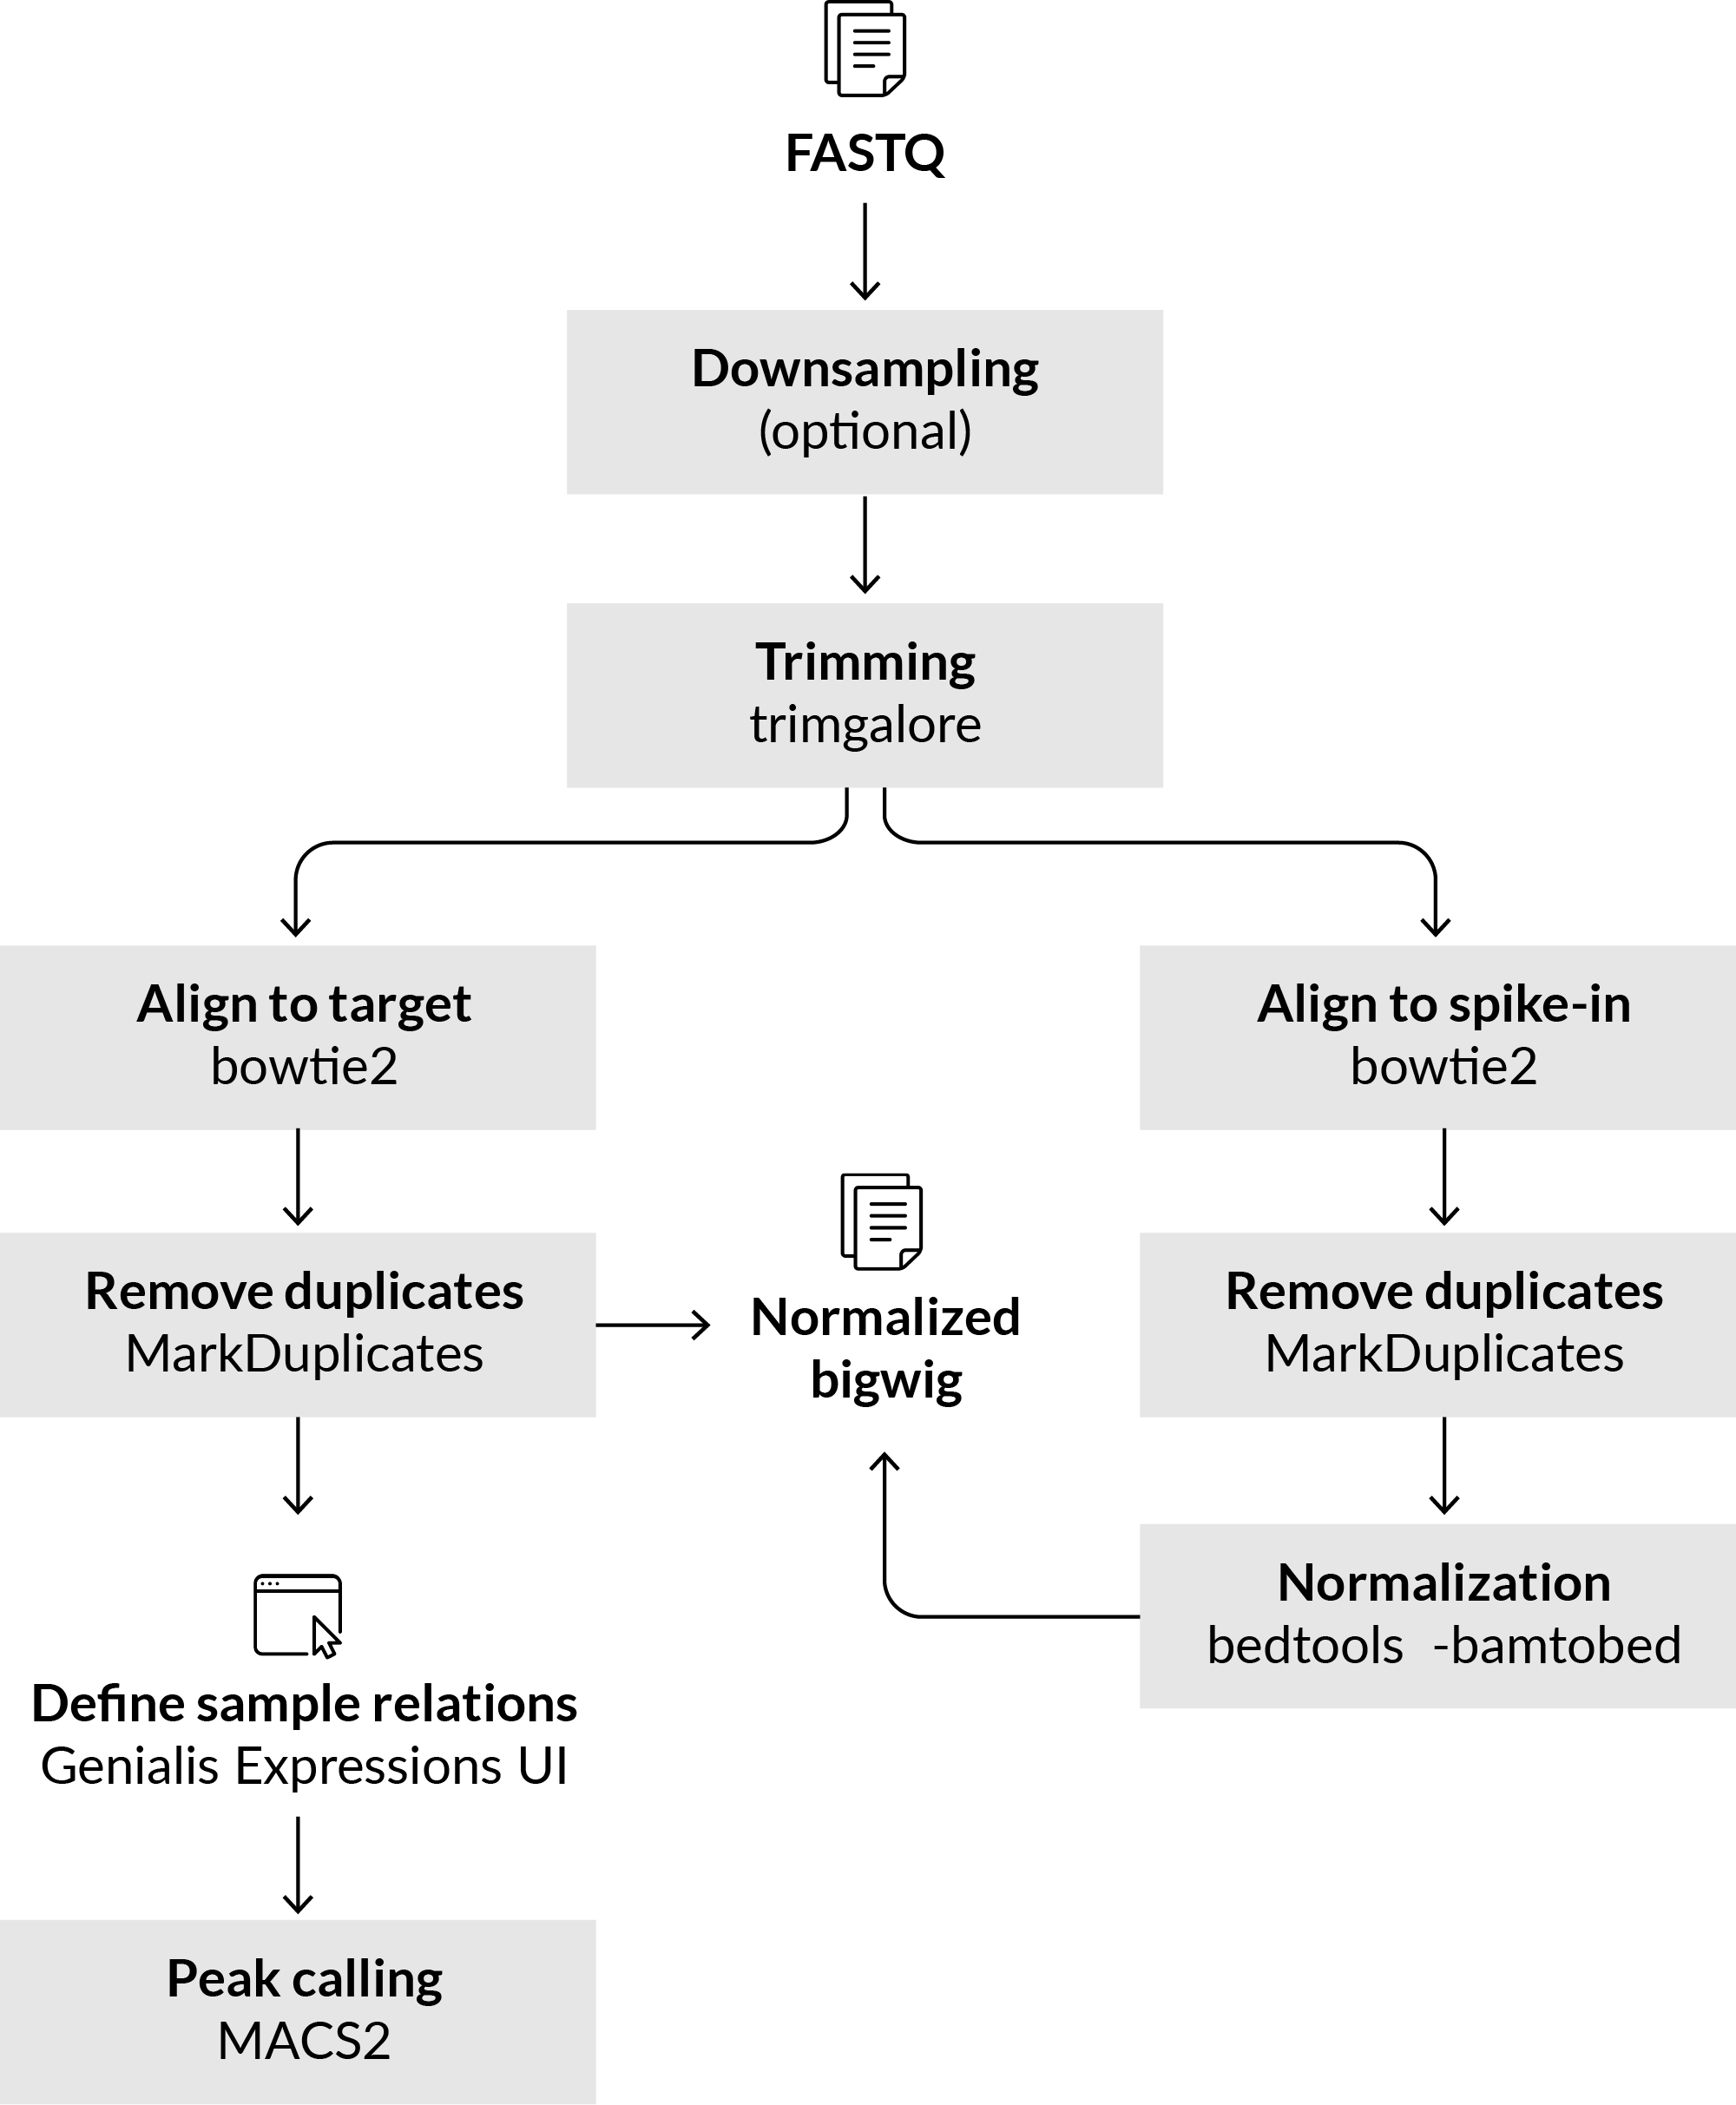
Preprocessing the data
Process the input files by running the Cut & Run pipeline. You can find it under the Tool catalog > Pipeline / DSS > Cut & Run pipeline. Select samples and possible background samples you wish to use for analysis. By default, the pipeline will work on human samples and some sensible defaults for trimming, aligning, filtering (optional), downsampling (optional) and deduplicating are already set. You can also analyze rat and mouse samples.
To normalize the data for between sample comparison, select a spike-in genome. By default, we’ve set the genome of Escherichia coli (K12), but you can pre-upload a custom genome to meet your custom needs.
Objects with deduplicated aligned reads can be used in the next step of peak calling. By default, the peak calling step is selected and triggered within the Cut & Run pipeline options. The default peak-calling step within the main processing pipeline does not consider control input samples for background correction. Where control samples are available, you can disable the peak-calling step in the main pipeline, and utilize control background samples in peak-calling step by setting the sample relations as described in the next section.
Peak calling using MACS2
Second and final step of peak calling is performed using the MACS2 (v2.1.1.20160309) process.
Defining sample relations
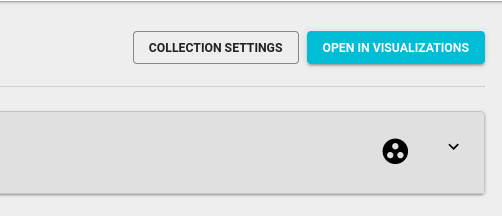
If you want to include background samples in your peak calling analysis, make sure you create sample relations. You can open the page for sample relations by clicking the round icon with three circles on the far right side of the Actions bar (just under the buttons for opening visualizations and collection settings, see figure below).
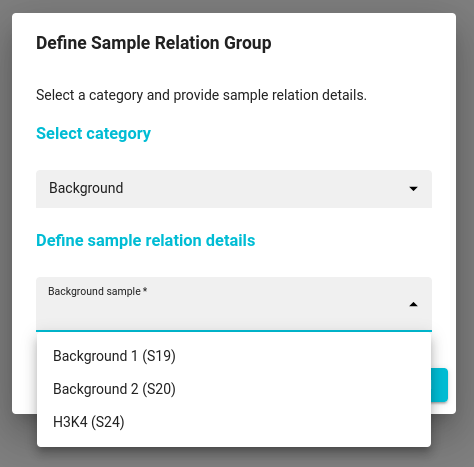
To create a relation, select case samples of interest you wish to process and click the Assign button at the right bottom of the screen. In a pop-up window, select the “Background” category and in the “Define sample relation details - “Background sample”, select the corresponding background sample you wish to use as the background sample.
The below figure shows the relations designed to process two case samples using a common background sample.
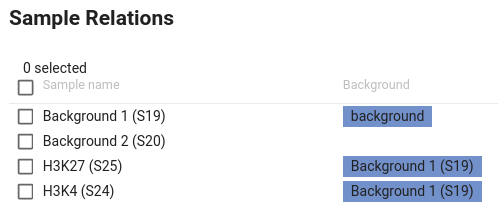
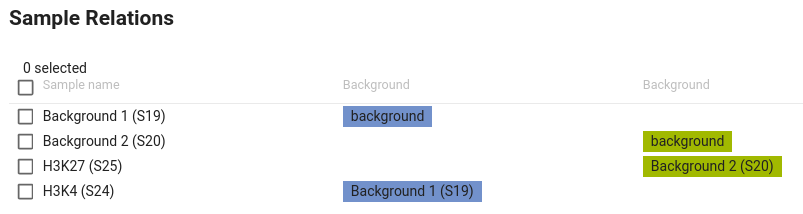
If you wish to process individual case samples with their corresponding background sample, you will have to select and define its background counterpart one sample at a time (final result shown below).
Note: that if you do not wish to use a background control in the peak calling step, you can forgo the above step of setting sample relations.
Peak calling
Once the (optional) relations are set, navigate to Tool catalog > ChIP-seq > Batch peak calling (MACS2). Select all case samples in Case (treatment) table and all background samples in Control (background) table. If you defined the sample relations beforehand, each case sample will be run with its corresponding background sample using the MACS 2 process.
You can enable quality control reporting specifically to the promoter regions. To achieve that, select the Promoter regions BED file, which can be a custom BED file you uploaded into the collection, or it can be one prepared by Genialis in the Genome resource files. To view the latter ones, make sure you click the Display all data toggle in the upper right corner of the table.
Under the Advanced parameters section you can fine-tune various additional options relevant for the analysis.
The pipeline may fail to automatically calculate Cross-correlation strandshift parameter. In such an event, please set User-defined cross-correlation peak strandshift parameter. The value should correspond roughly to the expected fragment size, which may depend on the broadness of the peaks.
If you wish to call broad peaks, check Composite broad regions parameter. Note that you may need to set parameter Broad cutoff.